

To make the tanks, we drill holes and cement threaded fittings into place using ABS cement. While ABS cement is intended to be a permanent bond, we occasionally see the large drain fitting leak. Depending on your comfort level, we can either send a replacement tank (current design, without the drain hole) or you can seal it yourself using ABS cement. Neither option is especially difficult—it just involves some time under the trailer. Review the repair and replacement steps below, then let us know which approach you prefer to take.
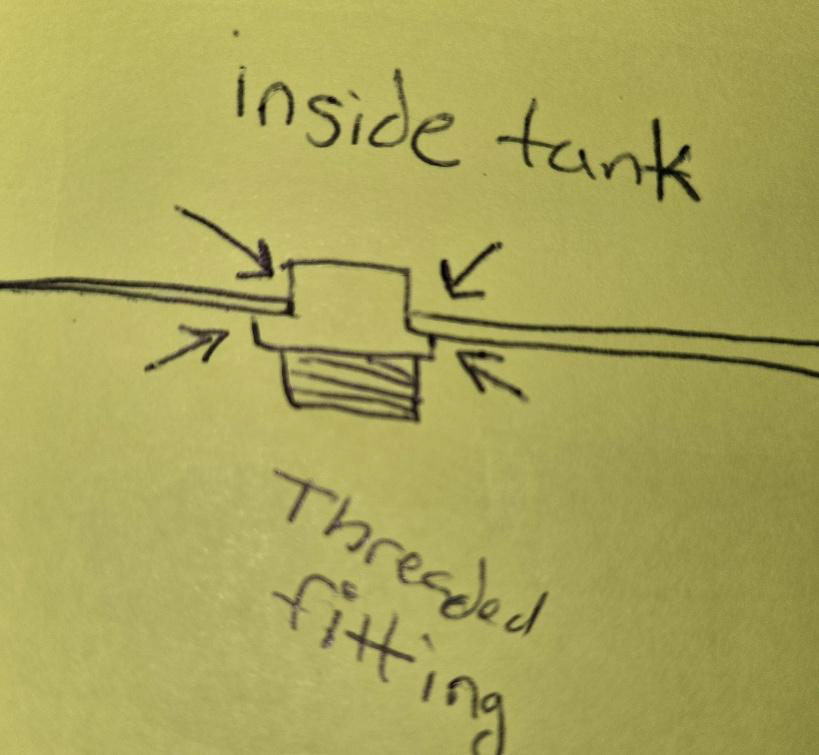
To repair: You’ll leave the fitting in place and apply ABS cement to both the inside and outside of the fitting so it can wick into (and fill) any small gaps. Placing the cement properly on the inside is more difficult, however, it offers the greatest potential for a lasting fix, so it is worth the effort.
Refer to the drawing below, showing where to apply the cement (arrows). Be sure to apply cement all the way around the circumference on both the inside and outside edges. Bending the cement dauber’s metal shaft may help you reach the inside edge more easily.
To remove and replace the tank:
- Loosen the hose clamps and remove the hoses from the tank.
- Fresh tank –
- Removing the white hose may damage the caulk going through the back galley wall -Fresh Tank
- You may find it necessary to unhook and remove the hose from the freshwater fill fitting under the sink to rotate/twist the hose from the barbed fitting on the tank.
- Loosen the 6 bolts holding the aluminum water tank support.
- Trailers before ~720 will have 3 additional ‘hidden’ bolts holding the tank to the frame which can stay in place
- Before removing the bolts, place a bucket/box/block or some other type of prop below the support so it doesn’t suddenly fall to the ground while you are removing the last bolts.
- Remove the prop, water tank and tank support from below the trailer. (Trailers before ~720 – bend the tank support down to allow the tank to slide out.
- Remove the tank and place the new tank in the support.
- Lift into place and support with the prop.
- Screw the bolts back into place.
- Reattach the hoses and hose clamps.
- Fresh tank – Apply additional silicone caulk around the hoses if damaged to keep a watertight seal between the underside and the galley